TypeScript Fundamentals: Diving Deeper (Part 2/2)

Whether you're continuing from Part I or jumping in fresh, you're in the right place.
In the first part, we covered TypeScript’s origins, how the compiler works, and foundational type system concepts like aliases and unions. While this post works on its own, the first part sets the stage nicely and might be worth a quick detour if you're curious.
Now that we’ve set the foundation, it’s time to take things up a notch.
In this second part, we’ll dive into more advanced features that make TypeScript truly powerful. We’ll explore utility types like Pick and Omit, work with advanced operators such as typeof and as, and learn how to extend existing type definitions in a clean and scalable way. We’ll also talk about the unknown type, get hands-on with generics, and see how TypeScript integrates smoothly with React.
By the end of this post, you'll be equipped to write more expressive, reusable, and robust TypeScript code.
Let's dive in!
Utility types
TypeScript comes with several built-in utility types that help you work with types more efficiently. These utility types are defined using something called generics. We’ll talk more about generics towards the end of this blog, but for now, all you need to know is that they allow a type definition to work with many different kinds of values instead of being limited to a single specific type.
Utility types leverage this flexibility to perform common type-level operations in a reusable way. While we won’t cover every utility type here, we’ll focus on a few especially useful ones.
Readonly<Type>
This utility type is self explanatory, it allows us to construct a type where all properties are non-reassignable. Here is a quick example:
With Readonly, trying to reassign the title property will result in an error. This is useful when you want to prevent changes to certain objects or properties after they have been initialized. One practical way to use Readonly is to mark function parameters as immutable, ensuring the function won’t modify the array passed in. Consider this snippet:
In this example, the commented-out line tries to add a language to the langs array, but doing so causes an error because langs is readonly inside the function. This prevents accidental mutation while still allowing callers to pass regular mutable arrays.
Record<Keys, Type>
The Record utility type allows us to specify both the keys and the values of an object. You might be thinking, wait a minute, didn’t we already learn how to type an object in Part I? And you'd be right:
This works just fine for simple cases. But notice that while the values are typed, the keys (a, b, c) are just string literals (they aren't enforced by a type). That’s where Record comes in handy, it lets you explicitly define a fixed set of keys and the type of their values.
In this example, we not only define the value objects (age and breed) for the dogs, but we also define the type for the keys using the DogName union type, ensuring dogs can only be named loki, trufa, or otto.
Pick<Type, Keys> and Omit<Type, Keys>
We’ll cover these two utility types together because they are essentially opposites. Pick and Omit let you select and exclude properties, respectively, from an existing type to create a new one. Here’s an example to illustrate how they work:
For the BoringSandwich type, we only picked the bread and cheese properties, whereas the VegetarianSandwich type has all of Sandwich properties except for the meat property.
While utility types make it easy to manipulate existing type structures, there are cases where they’re not the most efficient tool. For instance, say we have a base User type with a ton of properties such as, id, firstName, lastName, email, username, profilePicture, and many more. If we want to define an AdminUser that shares all the same properties but also includes admin-specific permissions, using Pick or Omit to recreate the entire User shape would be tedious and repetitive. Fortunately, TypeScript offers more efficient ways to build on top of existing types, allowing us to extend definitions rather than reconstruct them piece by piece.
Extending a definition
Now that we've seen how Pick and Omit can selectively shape types, you might be wondering how to expand a type instead (creating a superset that inherits the original structure and adds new capabilities). There are two primary ways to do this in TypeScript, depending on whether you're working with interfaces or type aliases.
For a type alias definition, we use the intersect operator (&):
And for interfaces we use the extends keyword:
This approach allows us to effortlessly build on top of existing types with minimal effort.
Typescript operators and modifiers
TypeScript gives us a handful of powerful modifiers and type operators. These are tools you can use to manipulate, extract, or assert types. They help make your types more precise. We’ve already described the optional (?) modifier and union (|) operator in Part I, and just recently went over the intersection (&) operator. Now, let’s take a look at a few more that are equally important.
readonly modifier
The readonly modifier makes individual properties immutable. It works similarly to the Readonly utility type we just covered, but with a key difference: while Readonly applies to an entire object or array, the readonly modifier gives you more granular control, allowing you to mark specific properties as read-only.
Take a User type, for instance, where fields like id or createdAt should never be modified after being set. Here is an example using the readonly modifier:
as operator
In JavaScript, as is valid only in import/export syntax. In TypeScript, it's used for type assertions.
Here we are telling TypeScript: I know exactly what input is; you should not infer it. I know without a doubt input is an HTMLInputElement. TypeScript normally infers the return type as Element | null, but you're asserting that it’s an HTMLInputElement, so you can safely access .value.
There is also a construct, as const, that not only makes values immutable but also preserves their exact literal types. This is known as a const assertion:
Here, method is not of type string; it is the exact string literal type 'POST'. This means you can't reassign it, and TypeScript will treat it as the literal type 'POST', which is more specific than a general string.
How is as const different from readonly and Readonly?
- The
readonlymodifier is used for individual properties or variable declarations. - The
Readonlyutility type makes all properties of an object type read-only, but only at the top level (shallow immutability).
By contrast, as const does two things:
- Makes the entire object deeply immutable.
- Narrows the type to exact literals (e.g., 'POST' instead of string).
A practical example of as const usage is with the i18n library, which handles internationalization by using translation files. These files typically store structured text content for different languages. The i18n docs recommend using as const to get both deep immutability and precise literal types, which improves safety and auto-completion.
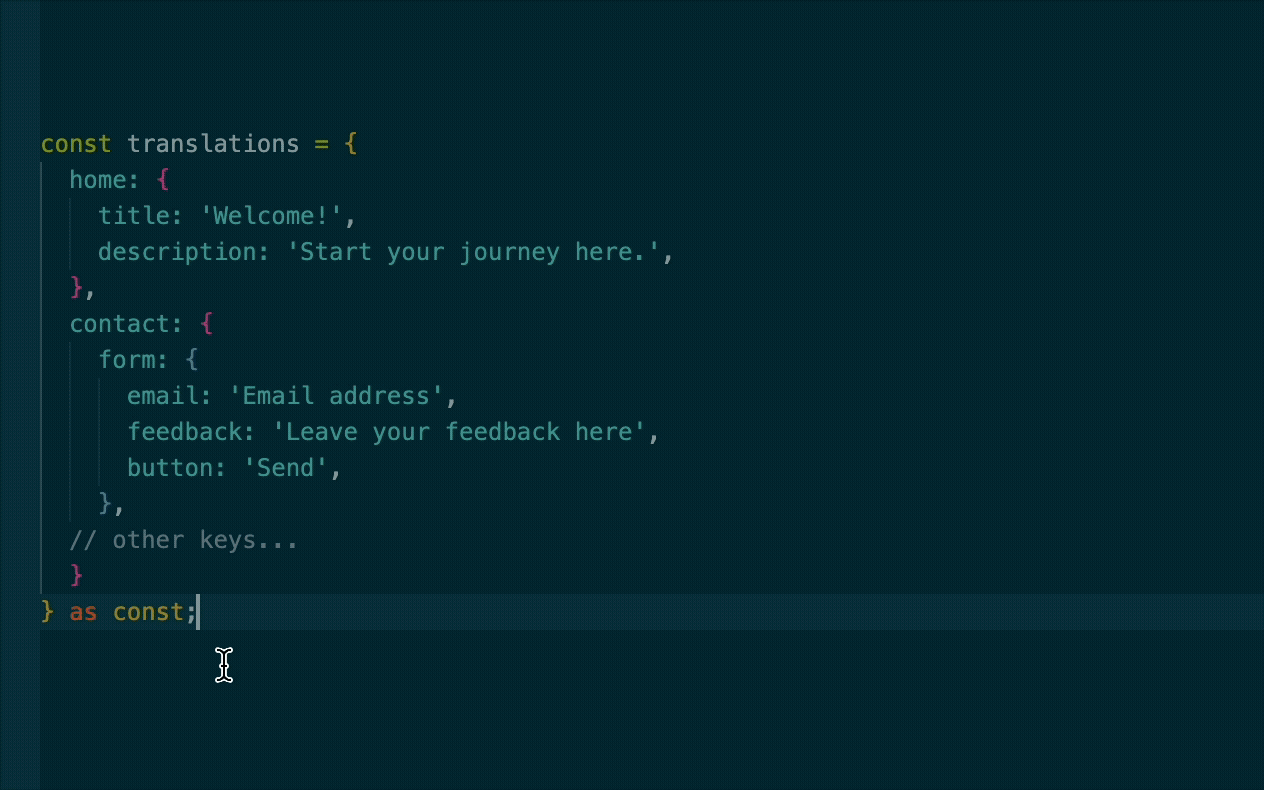
as const makes every nested value literal and readonly. Here's what that looks like.If we had instead used Readonly<typeof translations>, we would only get shallow immutability. That means the top-level keys, home and contact, would be read-only, but their nested properties would still be:
- Mutable (not readonly)
- Typed as general
stringvalues rather than their exact string literals
We can take this a step further by combining as const with the satisfies operator. While as const gives us deep immutability and exact literal types, adding satisfies ensures the object also conforms exactly to a predefined structure.
A practical application, and continuing from our last code example, is managing multiple translation files. This helps prevent issues like missing keys or accidental fallbacks, such as an English string appearing on a Spanish site because a key was left out.
Typically, you’d define a type schema like this:
Then, each translation file (english.ts, spanish.ts, etc) would look like this:
This way if we forgot to add a key or added a key that is not speficied in TranslationSchema, we would see an error like this:

passiveAggressiveSubtitle property to the translation results in an error since it's not defined in TranslationSchema.typeof operator
You've probably used typeof in JavaScript before. It’s a runtime operator that returns a string describing the type of a value:
In TypeScript, typeof has an additional use: it can be used at the type level to extract the type of a variable or constant:
This is super useful when you want to reuse the type of an existing value (especially constants or config objects) without repeating yourself.
keyof operator
keyof is a TypeScript-only operator that returns a union of the keys of a given type:
This is particularly useful for creating generic utilities, or when you want to restrict inputs to valid keys of an object:
Don't worry if this syntax seems unfamiliar; we'll cover generics later, and it will feel more natural then.
Finally, you can also combine keyof with typeof to extract the keys from a real object:
All these tools for type manipulation are great, but sometimes you're dealing with values that you can't confidently type at all. That’s where the unknown type comes in. We first introduced unknown in Part I as a safer alternative to any. In the next section, we’ll explore it further and learn how to take full advantage of its capabilities.
The unknown keyword
Back in Part I, when we introduced inline async function type definitions, we used an example like this:
Here, we explicitly added Promise<number> as the return type. But in simple cases like this, TypeScript can actually infer it automatically. In this case, async tells TypeScript the function returns a Promise, and since 26 is a number, the full return type is inferred as Promise<number>.
However, for more complex return values, it’s good practice to explicitly define the type, especially when the returned value is an object with a known shape:
Here, Promise<User> gives you confidence that the function will return something that matches the User interface.
This approach works well for internal APIs you control. But what happens when you're working with third-party APIs, where you think you know what the data looks like… but you're not completely sure? That’s where the unknown type becomes useful. By returning unknown, TypeScript does not let you use the value directly until you validate or narrow down its type:
unknown vs any
So, why not just use any? Because any lets you do anything, without any type checking at all, which can lead to runtime errors. In contrast, unknown provides some flexibility while still enforcing that you narrow down the type before using it. Here is a quick comparison:
In the example above, trying to access properties on an unknown value without first checking its type results in a TypeScript error. Meanwhile, using any bypasses all checks, allowing potentially unsafe code that may crash at runtime.
Using unknown forces you to be explicit about how you handle the data, making your code more robust and less prone to runtime errors.
One last important thing about the unknown type is that it works really well with schema validators (tools that check the shape of your data at runtime). While TypeScript checks types at compile time (before your code runs), schema validators like Zod and Yup validate data while your app is running.
These validators let you define exactly what shape you expect. For instance, a to-do object with an id, title, and completed field, and then safely check that the incoming data matches that shape. Here's how that looks in practice:
Once your data passes validation, TypeScript knows it conforms to the expected type.
React and TypeScript
Nowadays, most production-grade React frameworks include TypeScript support out of the box. Next.js, for example, no longer asks if you want to add it, it just sets everything up automatically (although you can disable it if you prefer not to use TypeScript).
So while there's nothing particularly tricky about getting started, there are some patterns and best practices worth knowing to use React and TypeScript effectively. Let’s walk through them.
If you're already comfortable with React-specific TypeScript patterns (like typing props, refs, or component state), feel free to jump ahead to the Generics section.
Components
Back in the day, you might have seen components typed like this:
That React.FC (short for React.FunctionComponent) was once the standard way to type functional components in TypeScript. It provides some conveniences out of the box:
- Automatically types children as a prop
- Ensures the return type is valid JSX
- Gives a consistent function signature for your components
These days though, using React.FC is no longer considered best practice. While it's still included in @types/react, it introduces implicit behavior (like always including children even when your component doesn’t use them).
This can make your types less precise and your components harder to reason about. Instead, the modern recommendation is to define props explicitly using an interface or type alias. This approach avoids surprises from the extra types React.FC injects behind the scenes. We’ll put this into practice in the next section.
Props
When working with a React component, the key TypeScript-specific feature is typing your component’s props. Since props are just an object, the syntax mirrors what we saw in the basics of TypeScript in Part I.
This inline approach is the simplest way to provide types for a component. However, as the number of props grows, this method can become hard to read and maintain. Let's extract the prop types using a type alias and add a new disabled prop:
Our component wraps the native HTML <button> element. As you can imagine, a <button> accepts a wide range of props. But, should we type them all manually? What if we wanted to accept a style prop too? Would we have type all possible css properties ourselves? That would be a maintenance nightmare. HTML buttons have dozens of valid attributes, and we'd need to keep our type definition updated with any changes to the HTML spec.
Fortunately, React provides us with a built-in utility type for this: ButtonHTMLAttributes. This type includes all properties a <button> can receive (HTML attributes like onClick, disabled, style as well as React-specific props such as key).
So, where does this utility come from? When you install @types/react, TypeScript reads from type definitions stored in node_modules/@types/react. These types are part of a community-maintained repo called DefinitelyTyped, which we covered in Part I.
That said, let's update our prop type alias using the React utility type introduced above:
ComponentPropsWithoutRef<'button'> provides all the native <button> props without requiring you to manually type each one.
Using ComponentPropsWithoutRef is generally preferred over older alternatives like ComponentProps, which is too broad, or ButtonHTMLAttributes<HTMLButtonElement>, which excludes React-specific props such as ref and key. If you do need ref, you can use ComponentPropsWithRef<'button'> instead.
Now, if we want to pass other properties that a button normally accepts, such as autoFocus, we won’t get an error. Furthermore, if we need to pass a property that a button does not natively accept, like variant, we'll need to extend MyButtonProps to include it in the type alias, like so:
Now variant is a valid optional prop, defined as a union of two strings with ‘primary’ being the default.
Children
Now let’s say we have a Modal component whose job is to confirm the deletion of an item from your cart:
This version works fine, but it isn't very flexible. For example, what if you want to include custom content like a message, an image, or other UI elements inside the modal? Right now, you're stuck with just the title and two buttons.
To make this component more modular and reusable, we can take advantage of the children prop. To do that, we'll need to use another utility type from React:
Here, we used ReactNode to type the children prop, allowing the component to accept a wide range of valid React content. ReactNode is a flexible type that covers everything from strings and numbers to JSX elements, fragments, arrays, and more. If you want to be stricter and only allow JSX elements, you can use JSX.Element instead.
Hooks
The type definitions from @types/react include types for the built-in hooks, so you can use them in your components without any additional setup. These types are smart enough to infer based on how you use the hook, so in many cases you won’t need to annotate types manually.
useState
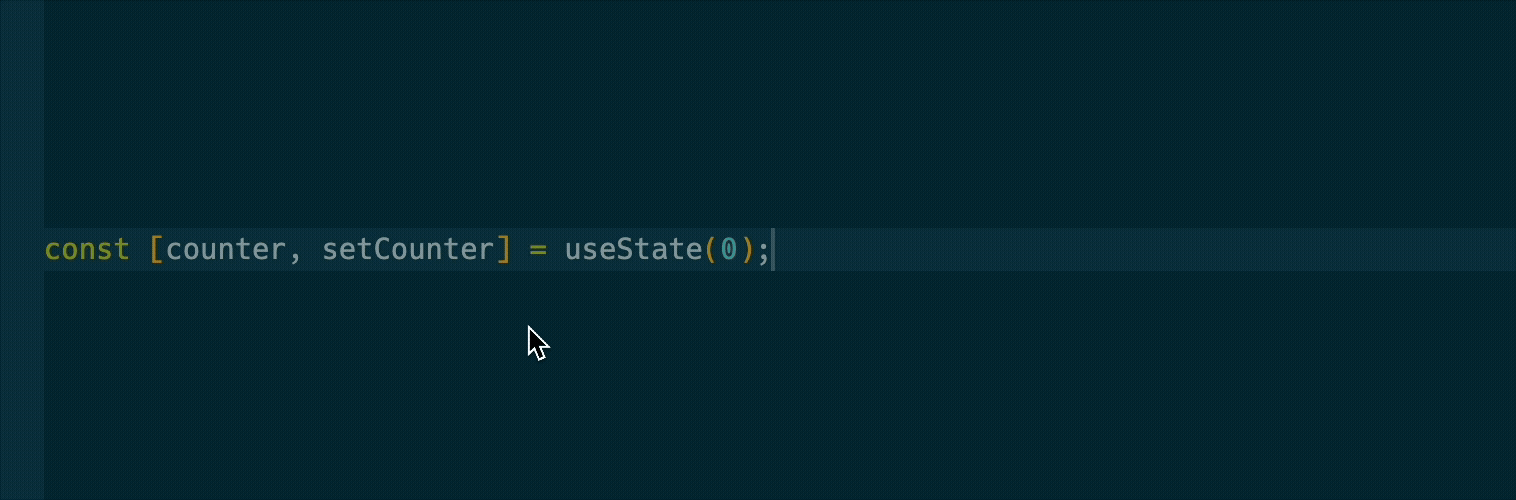
TypeScript inference uses the value we utilize to initialize the useState value. In simple cases where we have something like:
Here, we don’t need to specify a type, because TypeScript can easily infer that isLoading is a boolean.
However, there are cases where you should explicitly annotate the type. One common case is when the state is initially null but will later hold an object, such as when fetching data:
Or in cases where the value should be restricted, like this:
In both cases, we're giving TypeScript more information than it could safely infer on its own.
The last thing I’d like to mention is that when passing a setter to a child component, the type should look something like this:
This might look intimidating, but you don't need to memorize it. Just hover over the setter, and TypeScript will give you the exact type you need as seen below:
useState instance definition shows us the actual type.It’s worth noting that if you're using React 17 or newer with automatic JSX runtime, you may not be explicitly importing React anymore. In that case, TypeScript won’t recognize React.Dispatch or React.SetStateAction unless you import them. So, just do:
useRef
In TypeScript, when you initialize a ref with null, React's type definitions infer the type of the ref's .current property as T | null, where T is the type of the DOM element. This means that .current can be either the DOM element or null if the element hasn't been rendered yet.
For example, initializing a ref for a button element:
In this case, buttonRef.current is inferred as HTMLButtonElement | null.
When you create a ref to store non-DOM values (like a timer ID), you should include | null in the type if you initialize the ref with null. This correctly reflects that .current may be null before you assign a valid value.
DOM events
Even though events aren’t specific to React, you work with them extensively in React projects. Let's use an onClick event as an example:
we could hover over the e, and see the corresponding type definition:
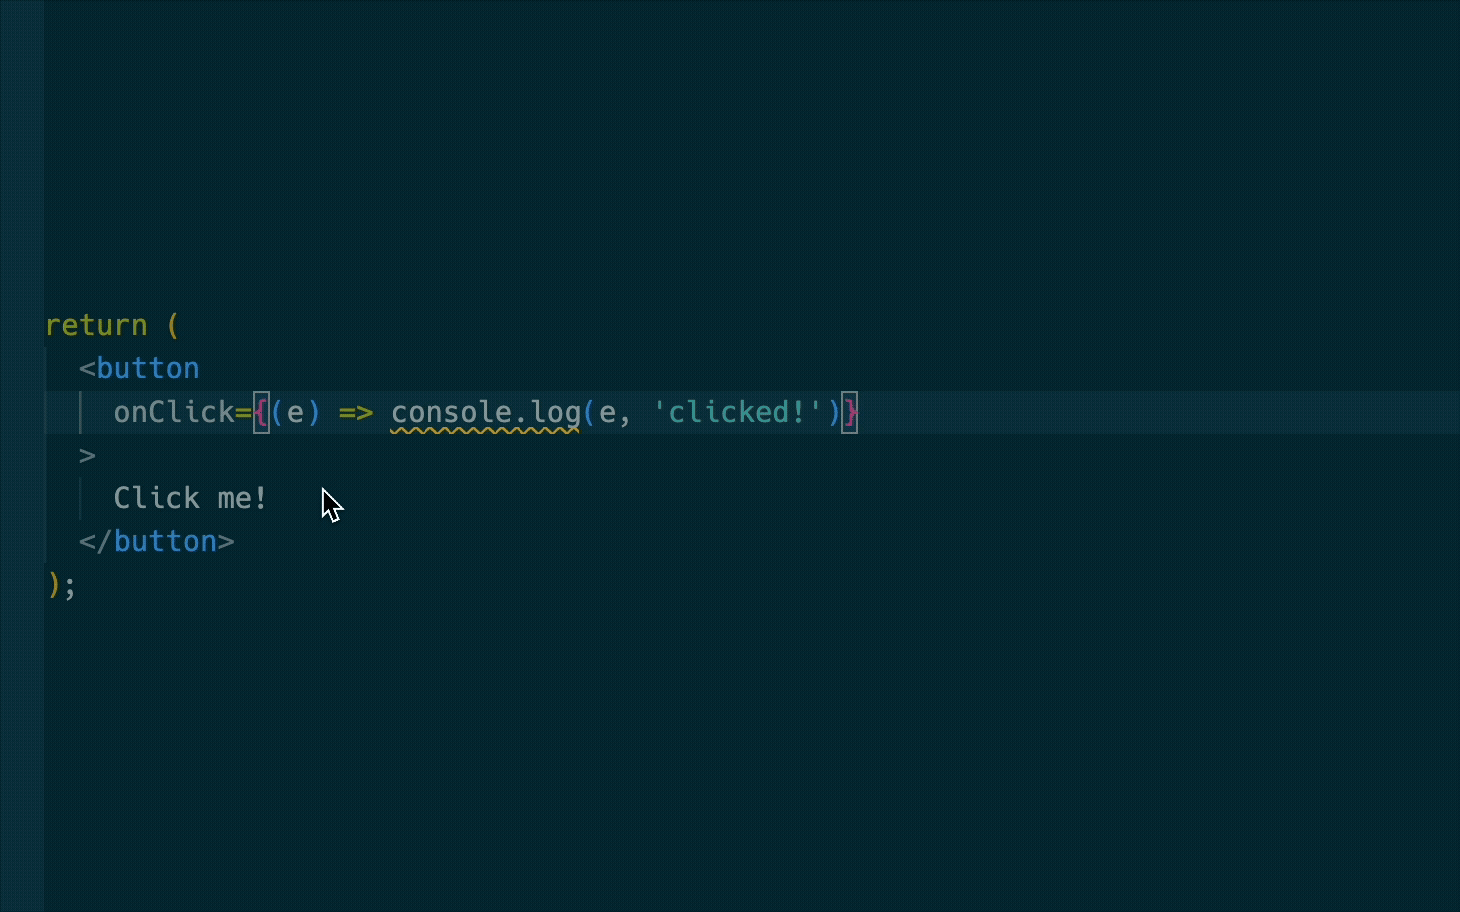
But if we were to define the function elsewhere and then pass it on to the onClick handler like so:
We would get the red squiggly lines telling us that e has a type of any.

onClick event handler outside the button results in TypeScript not being able to infer the type of e.This happens because inference only works inline, and when you extract the function, there's no context to pick up the type.
One thing we can do in cases like this is to define the function inline, hover over the inferred types, copy them and then just paste them in the function definition.
Generics
You can think of generics as placeholders for types, allowing you to delay deciding the exact type a function or component will work with. Generics are utilized to build reusable and type-safe components.
Let's go over an example, how would you type the argument of a function that simply returns whatever value type you provide?
Using any means we lose type safety, because TypeScript can’t infer whether value will be a number, string, object, or anything else. That’s precisely the problem generics exist to solve:
Now, whatever type we pass in, the function returns that exact same type. So if we pass in a number, it returns a number. If we pass a string, it returns a string.
A quick note on generics in .tsx files When using generics in arrow functions, add a comma after the type:
const convertToArray = <T,>(value: T): T[] => {return [value];};Without the comma,
<T>may be misinterpreted as a JSX tag. The comma ensures TypeScript treats it as a generic, not JSX.
Generics in React components
Suppose we want to create a reusable List component that takes an array of items and renders each one.
Now we can use it with any kind of list:
TypeScript keeps track of the type inside items and makes sure the renderItem function matches.
Constraining generics
Sometimes you want to limit what T can be. Let’s say we want a function that only works with objects that have an id property:
This way, if you try to call getId on something that doesn’t have an id, you’ll get a TypeScript error.
Conclusion
TypeScript adds a powerful type system to JavaScript, helping developers catch errors early, write more predictable code, and build scalable applications with confidence.
In this guide, you've not only learned the fundamentals of TypeScript and how to integrate it into both vanilla JavaScript and React projects, you've also explored how it works internally, the reasons behind its creation and the real-world problems it aims to solve.
Remember, TypeScript is designed for gradual adoption. You don’t need to master every feature on day one. You can start with minimal type annotations and increase type safety as you become more comfortable with the language.
Anyway, thanks for sticking around, and hey, maybe TypeScript isn’t so scary after all!
Missed Part I? Read it here!
Bonus:
Node 23 lets you run TypeScript files directly, no need to compile to JavaScript first. Just run
node script.tsand you're good to go. Node strips the types at runtime automatically. Here is the actual pull request.Typescript was recently rewritten in Go, bringing a 10x performance boost. Read about it here.
Meta created their own static type checker for JavaScript called
Flow. Although it was promoted internally, and even used in React (as seen in the repository),Flownever achieved widespread adoption. Over time, TypeScript’s superior tooling, developer experience, and vibrant community established it as the preferred solution for typed JavaScript.Don’t be afraid to explore the
@typesfolder. Although it may look complex, it can help you understand how types are constructed and related. Next time you encounter a type likeMouseEventHandlerin VSCode, you can use Go to Definition (Cmd+Click) on the type to jump directly to the file where it’s defined.As your project grows, organize types in separate files to avoid duplication and improve maintainability. When importing types without runtime code, it is a good practice to use the
typekeyword for clarity and potential performance benefits:import type { User } from ‘./types/UserTypes’;For larger projects, using path aliases helps avoid long import paths. Just avoid naming aliases
@typessince it conflicts with the reservednode_modules/@typesdirectory.